Viruses have always been a hindrance to Windows-based systems. They can not only have a damaging effect on them but also be involved in the theft of user data.
One of the most serious threats of our time is Win32.Malware-gen. What types of viruses are in front of us, and how to fight them, will be described below.
The proposed solution should not cause any particular difficulties, but at the same time, it is beneficial to get some important nuances, knowledge of which will make it possible to get rid of not only this threat but also many other viruses.

Table of Contents
What is Win32:Malware-Gen?
Win32 Malware Gen is an assembly language virus that is generically designed to launch the Trojan on a Windows computer. He has the capacity to rebuild himself.
Its other names are Trojan and Simile, but due to its rebuilding ability, it is also referred to as (a metamorphic computer virus ). 90% of the codes of this virus are counted in this process.
Behaviors of Trojans Such as Win32 Malware Gen are as Follows:

- Download and install other malware.
- Use your computer for click manipulation.
- Record your keyboard input and the sites you visit.
- Send information about your PC, including usernames and browsing history, to a remote malicious hacker.
- Give a malicious hacker remote access to your PC.
- Some advertisements are injected into the web pages you visit.
- Random text on web pages is turned into hyperlinks.
- Browser popups appear and recommend bogus updates or other software.
- Malavida.com Reviews: Is it a Trusted Site? (Qvo6)
Read Also:
Win32:Malware-Gen Threats: What is the Impact on the Computer?
As already mentioned, the threat is hidden, so at first, the user is unlikely to guess that the virus has resolved in the system. After a while, the impact began.
The virus infiltrates the browser and is directly redirected to the infected site, as a result of third-party malware penetrating the system.
Over time, the load on system resources increases, and the Internet connection is broken.
The virus communicates with its servers and sends confidential user information to them.
Eventually, the effects lead to changes in critical registry keys, Windows glitches, blocking of some websites, and even dysfunction of antivirus software.
Best Ways to Remove Win32:Malware-Gen [2024]
All of the tools used in our malware removal guides are completely free and will remove all traces of malware from your computer.
Please know that malware removal isn’t that easy, and we’ll help you strongly recommend backing up your personal files and folders before starting the malware removal process.
Method 1. Run a Scan With Malwarebytes
- Download Malwarebytes on your computer.
- Double-click on the mbam-setup.exe file and follow the instructions to install the program.
- At the end, make sure to check the Update Malwarebytes and Launch Malwarebytes box.
- Then click on Finish.
- If an update is found, it will be downloaded and installed to get the latest version.
- After the program loads, select Run a quick scan, and then click Scan.
- When the scan is complete, click OK and then click View Results to see the results.
- Make sure everything is checked except items in the C: \ System Volume Information folder and click Remove Selected.
- If you accidentally close it, the file is saved here and will be named like this: C: \ Documents and Settings \ Username \ Application Data \ Malwarebytes \ Malwarebytes’ Anti-Malware \ Logs \ mbam-log-date (time) .txt
Note: If the MBAM encounters a file that is difficult to delete, you will be faced with one of the following two prompts.
- Click OK for either one and let the MBAM continue with the disinfection process.
- If you are asked to restart the computer, please do so immediately. If you do not restart the computer, the MBAM will not be able to remove all malware.
- After restarting in normal mode, relaunch Malwarebytes and perform a full system scan to verify that there are no threats left.
Method 2. Perform a Scan With HitmanPro
- Please download HitmanPro to your computer from one of the download sites
- Double click on HitmanPro to start the program. If you have problems e n trying to start hitmanpro, you can use the Force Breach fashion.
- To start HitmanPro in Force Breach mode, hold down the left CTRL key while double-clicking HitmanPro, while all non-essential processes will be terminated, including malware-related processes.
- HitmanPro will start and you will need to follow the instructions (by clicking the Next button ) to run a system scan with this program.
- The program will start to scan the computer. The scan will usually take no more than 2-3 minutes.
- Click on the Next button and choose the option to activate the free license
- Click on the ” Next ” button so that the infections will be removed.
- Now click on the “Save Log” option and save this log to your desktop.
- Click on the Next button and restart the computer.
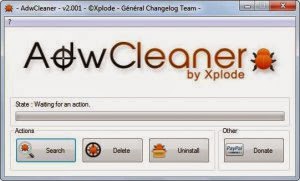
Method 3: Remove Win32 Malware Gen Using AdWare
Here’s how to get rid of the evo gen virus and other malware using AdWare:
- Download the latest AdWare ( Download Link )
- Click the downloaded .exe file
- Click “Scan”
- Click “Clean”
Wait for the scanning process to complete. AdWare asks us to restart the computer to complete the virus cleaning process on the computer. Do a restart!
Once finished restarting, a notification will appear in the form of a notepad file that opens automatically.
There is a list of other viruses. What is deleted is not only Win32 Evo Gen, but also other malware, adware, or spyware.
We are asked to be careful when downloading or installing applications. Because the Win32 Evo Gen virus or other malware usually infiltrates via the files that we install. Always download files from the official site!
Computers that like to be used to browse porn sites and online gambling blogs are usually susceptible to virus infections. Hence, fine browsing 🙂
Method 4. Perform a Full (deep) Scan With Emsisoft
- Download the Emsisoft Anti-Malware installer to your computer.
- Once the installer has downloaded, double-click the EmsisoftSetup.exe icon to install Emsisoft.
- If the installer displays an alert about Safe Mode when you try to install Emsisoft in Safe Mode, please click the Yes button to continue.
- You should now see a message asking which language you want to use.
- Please select the language you want to use and press the OK button.
- In the next screen, accept the license agreement by checking the option “ I accept the agreement ” and clicking on the installation button.
- After copying the necessary files, you will come to a screen that asks you the mode in which you want to use Emsisoft.
- If you want to use free mode without protection, choose this option, we recommend you to use 30 days free trial (in this option you can get the full version of Emsisoft for free, click here for more information about the Emsisoft Referral Rewards program ).
- You will then find yourself on a screen where you will be asked if you want to join the Emsisoft anti-malware network. Read the descriptions and uncheck the options you want to use. When you are ready, click the Next button.
- Then Emsisoft Anti-Malware will start updating its anti-virus defenses.
- When the updates are complete, click the Clean computer now button.
- Emsisoft Anti-Malware will start loading its scan engine and then display a screen asking you what type of scan you want to perform.
- Please select the option ” Scan in detail ” and then click the button ” Analyze “. The Scan in detail option takes the longest time to scan your computer, but it is also the most detailed. Since you’re here to clean up infections, it’s worth the wait to make sure your computer is properly scanned.
- Emsisoft will now start scanning your computer for rootkits and malware.
- Please be patient during this operation.
- Once the scan is complete, the program will display the scan results that show which infections have been detected.
- Now click on the Quarantine selected objects button, which will remove the infections and quarantine them in the program.
- If you see a message of All malicious objects has not been quarantined, do you want to quarantine them now, click “ Yes ”.
- You are now on the last screen of the Emsisoft Anti-Malware installer, click on the Close the installation wizard button.
- If Emsisoft prompts you to restart your computer to complete the cleaning process, please allow it to do so.
- Please restart your computer directly when Emsisoft Ant-Malware is finished to complete the installation process.
FAQs On Win32:Malware-Gen
Question: Hello, can someone help me figure out when a file is marked as Win32: Malware-gen?
Answer: Hello. Generic threats are files that your antivirus might look suspicious of but do not match any known threats.
Question: This file is downloaded for my use. Can you tell me why this file was marked as Win32: Malware-gen?
Answer: A notification of your program antivirus warning about it has detected Win32: Malware-gen on your computer indicates that a 32-bit file on your Windows PC can be malicious.
Conclusion
Those are some steps to remove the Win32:Malware-Gen virus from your computer manually.
In principle, doing trojan removal only requires courage and sufficient knowledge about the trojan you are dealing with.
After these two things are fulfilled, even without certain applications you can clean trojans from your computer.
Note: We don’t promote any kind of malware, this article is only for educational purposes only.
![[Solved] Nvidia Geforce Experience Error Code 0x0001](http://www.aecargo.com/?big=wp-content/uploads/2021/02/Solved-Nvidia-Geforce-Experience-Error-Code-0x0001-1-218x150.png "Fixed: Nvidia Geforce Experience Error Code 0x0001 [2024]")


![[Solved] Nvidia Geforce Experience Error Code 0x0001](http://www.aecargo.com/?big=wp-content/uploads/2021/02/Solved-Nvidia-Geforce-Experience-Error-Code-0x0001-1-100x70.png "Fixed: Nvidia Geforce Experience Error Code 0x0001 [2024]")

