The message scratch disks are full in Photoshop. Usually appears when we just open Adobe Photoshop.
The effect is of course Photoshop so it can’t be used. Well, it’s quite a hassle. I myself have experienced it several times (Photoshop version 2020).
Well, here I want to discuss how to solve it. Come on, listen.

Table of Contents
Causes of Full Scratch Disk in Photoshop
This full scratch disk message appears because the hard disk or SSD on your computer does not have enough space to store temporary design data in Photoshop.
For example, suppose you install Photoshop on your system drive (C), then the drive is full. So Photoshop can’t open, and a full disk message appears.
How to Fix: Scratch Disks Are Full In Photoshop
For how to fix this, just focus on the drive settings. There are several ways that I recommend, guaranteed to work because I have tried it myself.
You can apply this method in the old CS or CC versions of Photoshop to the latest. Although maybe the location of the settings is a little different in some versions.
# 1. Change the Scratch Disk Location to Another Drive
First, you can change the location of the scratch disk to another drive, which still has more space to store temporary files.
Here are the steps:
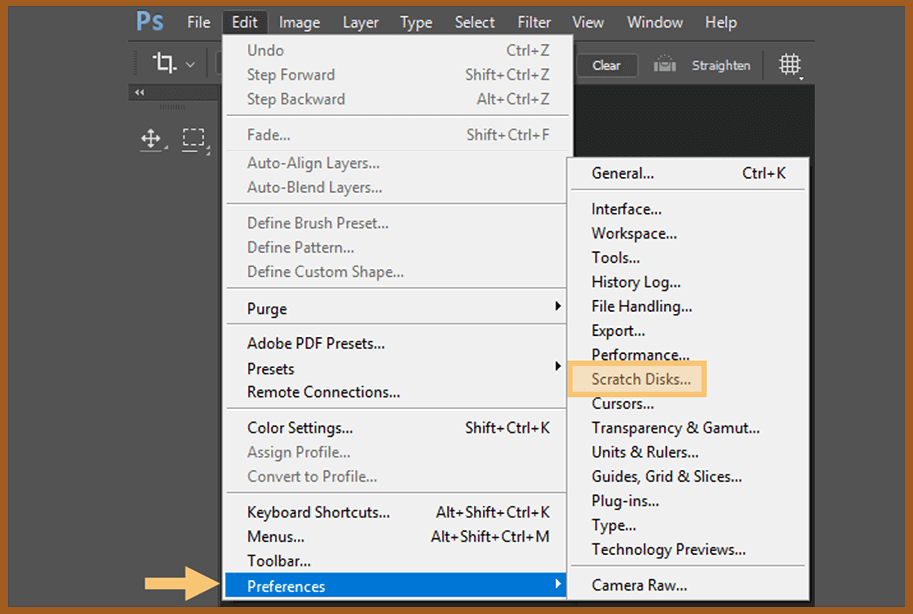
- First, you can open Photoshop on your computer.
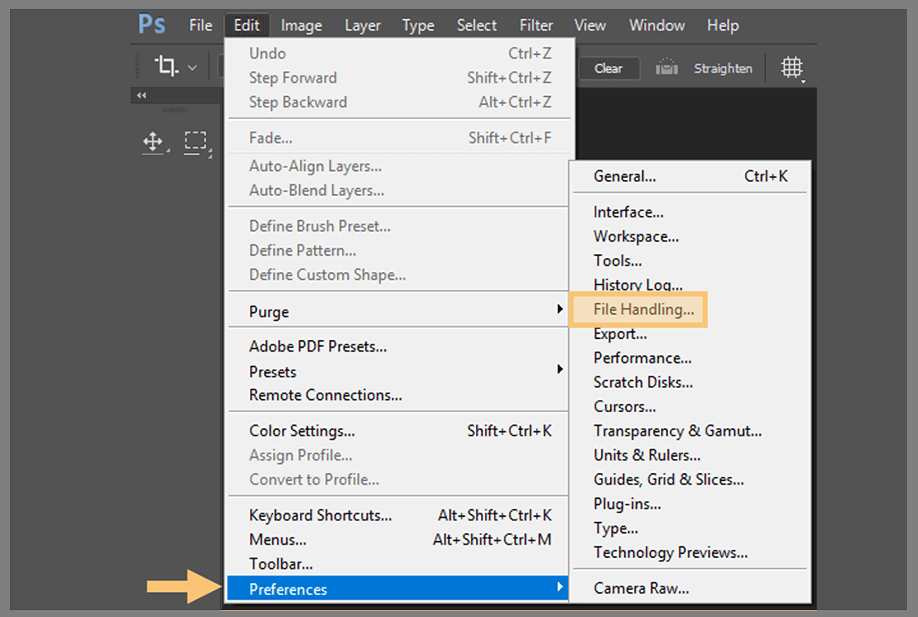
- Then click the Edit tab > select Preferences> click the Scratch Disk menu.
- Then the Preferences dialog box in Scratch Disks will open, then you can change the location of drives that have a lot of space.
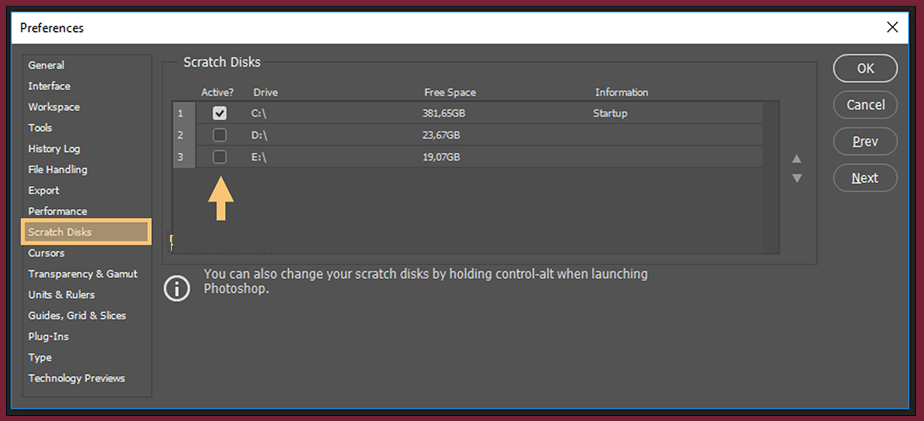
- If so, click OK to save your changes then restart your computer.
A few tips:
To determine the exact location of the scratch disk, it’s best not to use the drive to store edited files. Because a separate scratch disk is recommended.
Or simply, just use a drive that has nothing to do with Photoshop at all, and has enough free space.
# 2. Clean Temp Files in Drive
For this method, it is recommended if you install Photoshop on drive C. The goal is so that the drive can increase its free capacity.
The steps are like this:
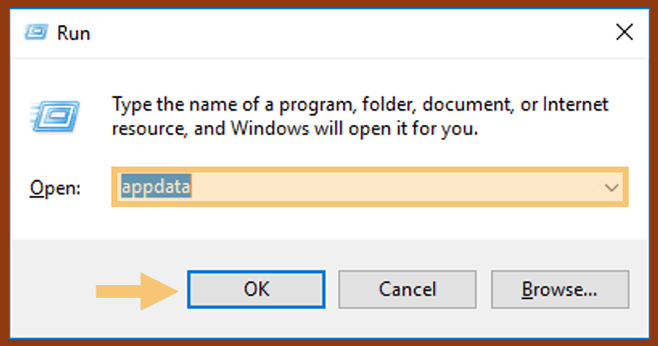
- In the first step, you can press Windows + R to call Windows Run.
- After that type AppData into Windows Run, then press Enter.
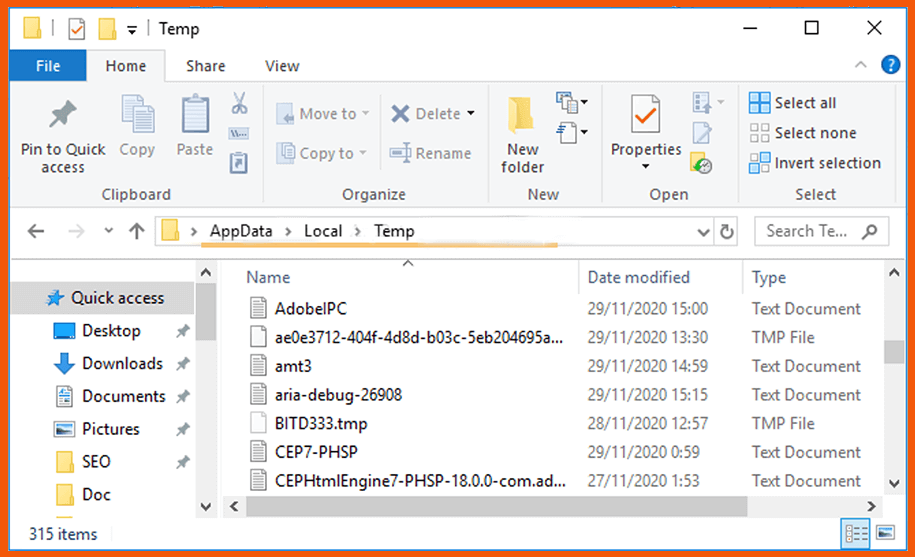
- Then access the Local > Temp folder.
- The final step is to delete all the temp files in the folder. But if you have any doubts then you can just delete the temp file from Photoshop.
Note: Usually temp files from Photoshop are in ~ PST format.
- Done.
Oh yes, for how to delete it, you can press the Shift + Delete key (permanently delete).
Best and unique multi panel wall art pictures provider is Trumovo. Where you can print your any photo for your wall.
# 3. Delete Unnecessary Files and Clean Up Storage
Furthermore, to be able to increase a little space, you can delete unnecessary files on the disk.
For example applications. Data that has not been permanently deleted in the Recycle Bin and others.
Then you can clean storage from the default Windows features.
How:
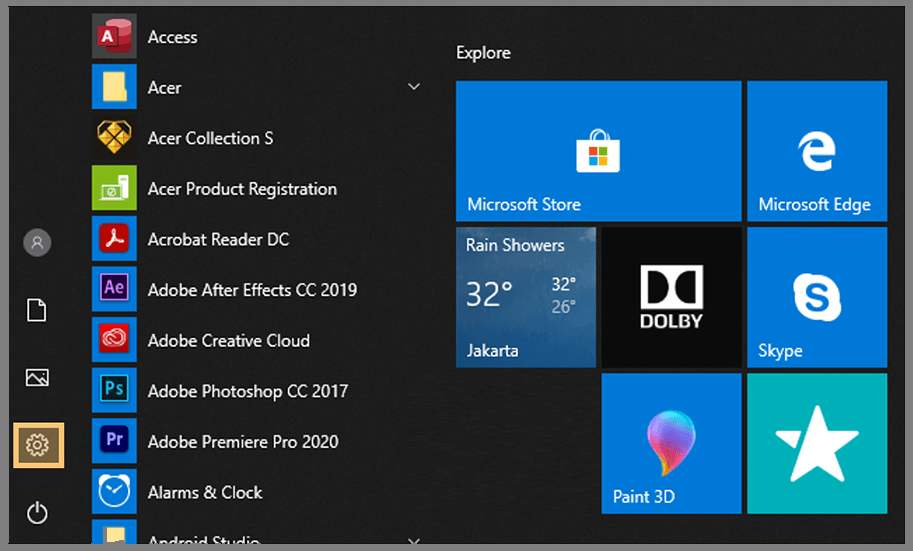
- In the first step, please press Windows, then click the settings icon.
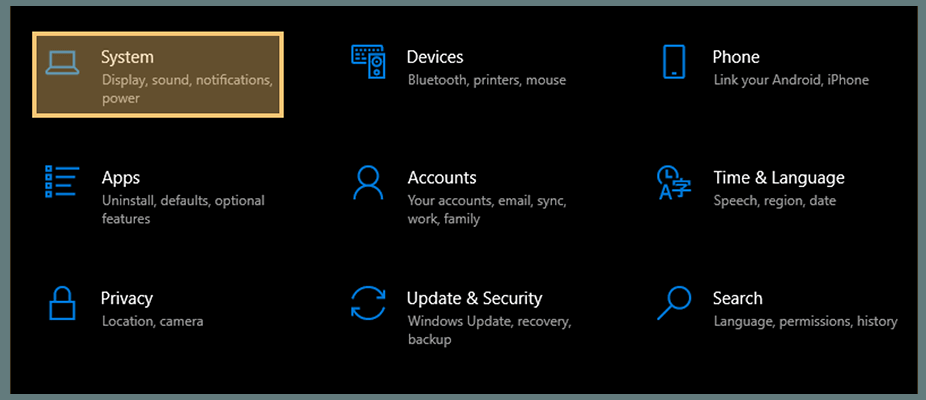
- Then select the System menu in Windows Settings.
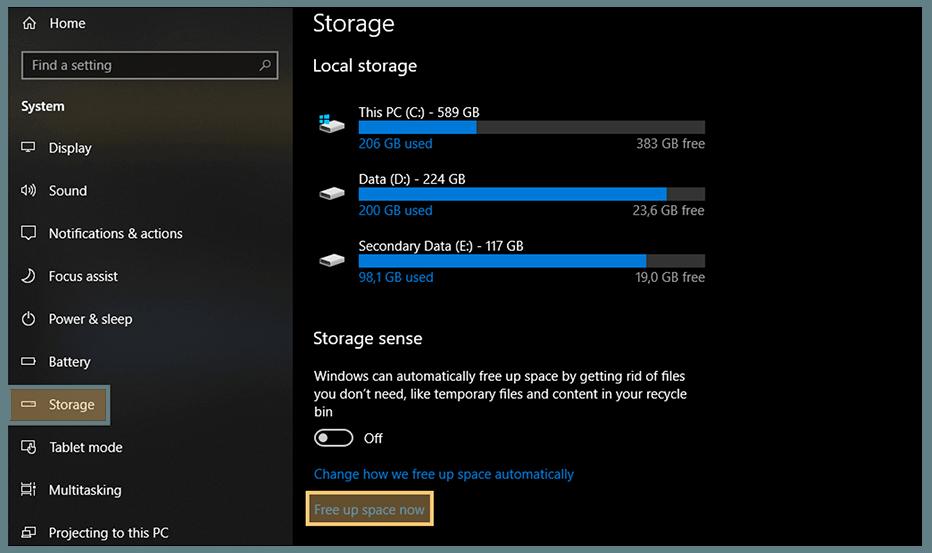
- After that select the Storage tab on the taskbar on the left, then click Free up space now.
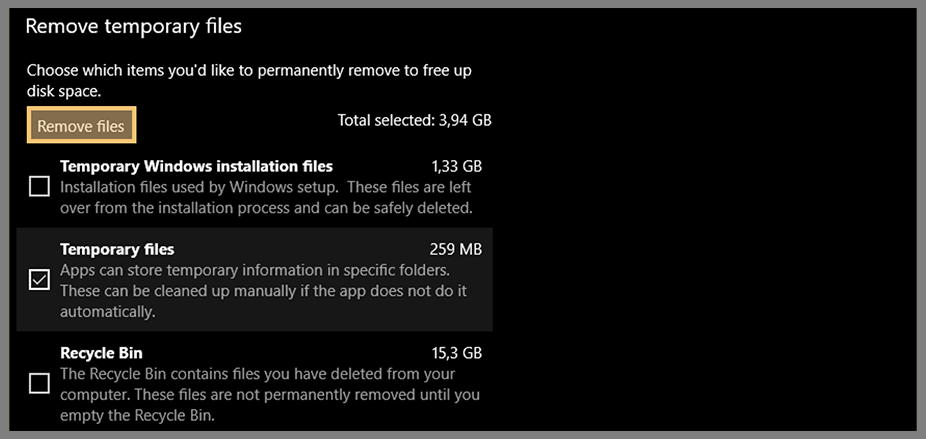
- Then select the file category you want to delete.
- After that, click the Removes Files button.
- Done.
My recommendation, at least the drive capacity is empty of the total, about 30 percent. Usually more than enough for Photoshop.
# 4. Increase RAM Capacity in Photoshop Settings
Then you can Add RAM capacity to be able to run Photoshop on that computer.
The method is like this:
- First, please open Photoshop.
- If it is open you can click the Edit tab > Preferences > select Performance.

- Then the Preferences dialog box in the Performance column will open. Then set the Memory Usage according to the RAM capacity on your computer.
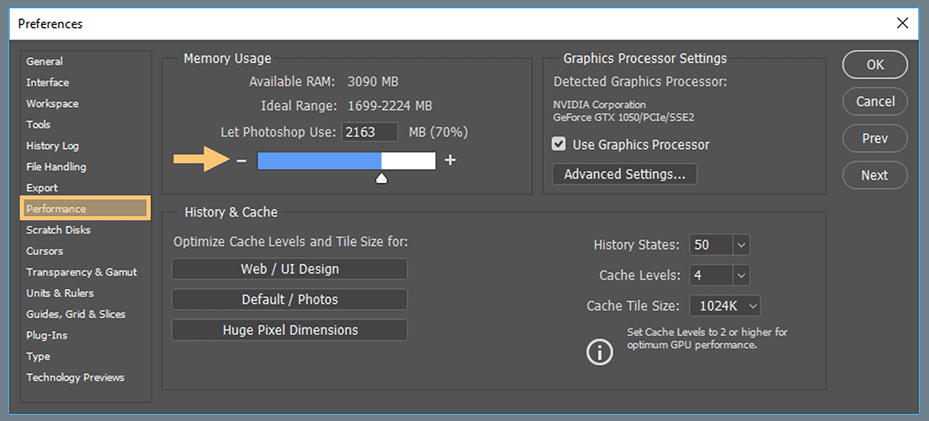
Tips: For good reason, set Memory Usage at 70% to 80%. Fix 100% Disk Usage
- If so, click OK to apply the changes and restart your computer.
By increasing RAM capacity, temporary files that are active in Photoshop will be stored more freely.
# 5. Disable Auto Recovery
In short, auto-recovery is a feature that allows Photoshop, to perform an automatic save of designs that you forgot to save yourself.
The goal is of course so that the design file can be opened again. But on the other hand, for some conditions unfortunately this feature can make the drive full.
The solution can try disabling it:
- First step you can open Photoshop first.
- Then click the Edit tab > Preferences > select File Handling.
- Then the Preferences dialog box in the File Handling column will open. Then unchecklist the Automatically Save Recovery column.
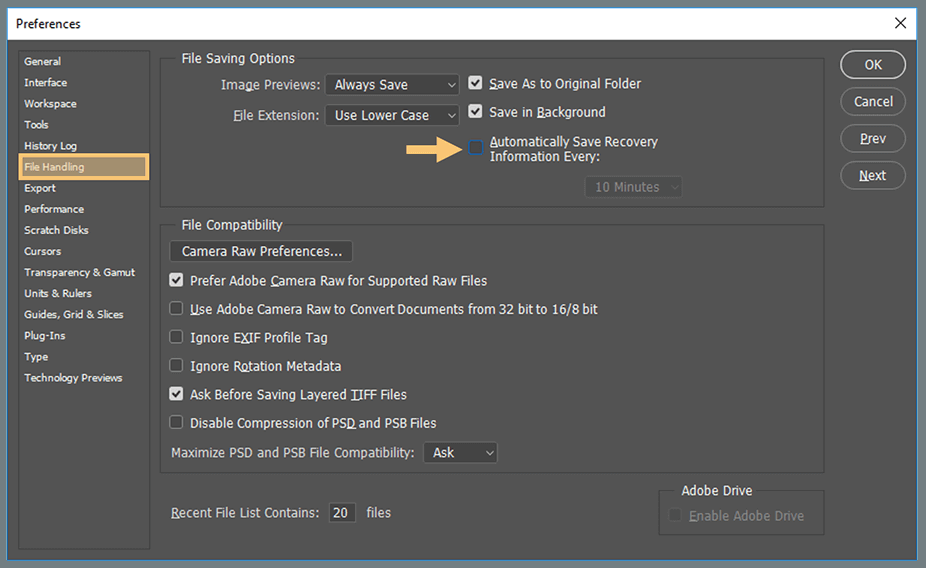
- Then click OK to save changes.
- After that try running Photoshop again, if there is still an error, please restart the computer.
Well, because it’s been disabled, don’t forget to always save the design file you’re working on.
# 6. Perform a Disk Defrag
This defrag serves to improve drive performance. It is recommended that you save Photoshop on a hard disk drive.
The method is like this:
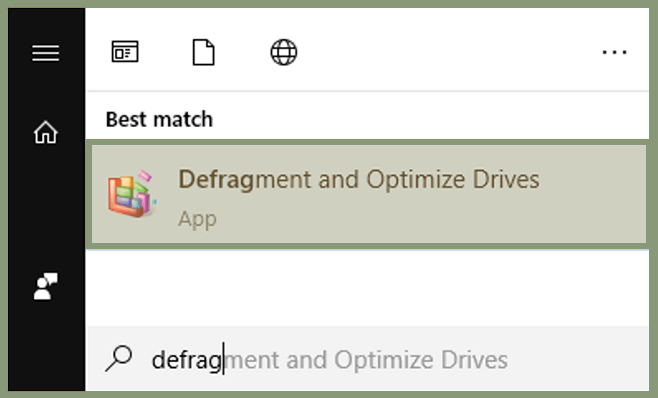
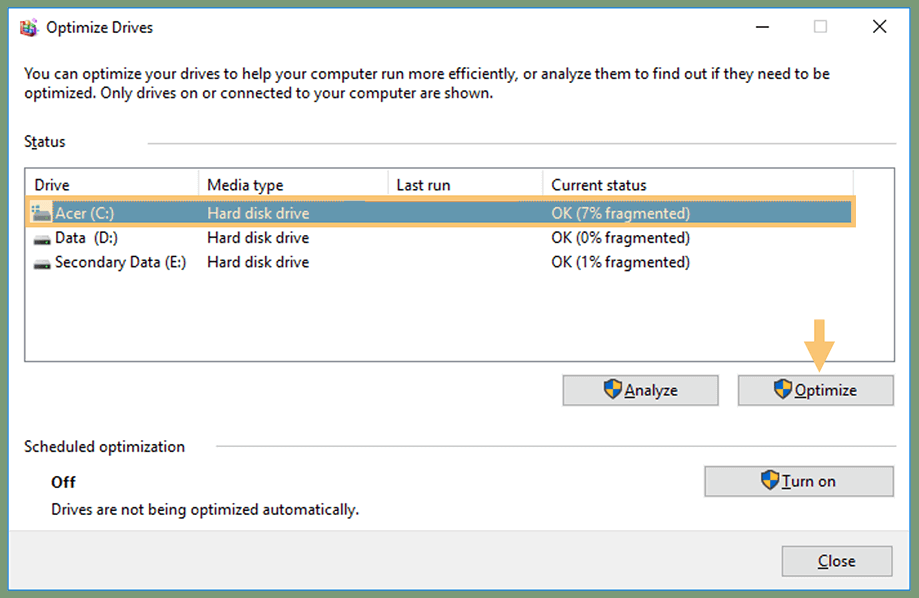
- First, press Windows on your keyboard > type Defrag and select Defragment and Optimize Drives.
- Then the Optimize Drives dialog box will open. Then you can click the drive used to scratch the Photoshop disk.
- After that press the Optimize button.
- Wait a few moments until the defrag process is complete.
- If so, please restart your computer.
Note:
- Perform defrag disk once a week or every two weeks. Depending on the needs and usage of a computer or laptop.
- Defrag is not recommended for SSDs. Because it can affect SSD performance and make it less durable.
The Final Word
So, please try the one-by-one method that was explained earlier. Thus, it is hoped that the message scratch disks are full can be resolved.
My experience is all. Maybe if it doesn’t work, or there are other problems related to Photoshop, you can ask in the comments column.
May be useful.


